
Vaping has become a worldwide phenomenon over the past few years, with many believing this rise’s popularity is attributed to the constant increase in the price of tobacco.
Others are less fiscally-minded and believe this shift in consumer behavior is due to the emergence of the conscientious consumer.
Whatever the reason may be, the outcome is clear: vaping is here to stay. As DIY eJuice becomes more and more popular, VapeFuse is here to fill you in on the potential harms that are associated with mixing your own liquid tobacco.
Nicotine itself was used as a pesticide to kill bacteria and organisms in large crop operations, so care definitely has to be taken to ensure your product is safe.
Mixing Your Own Nicotine eJuice
Step 1: Base Mixture
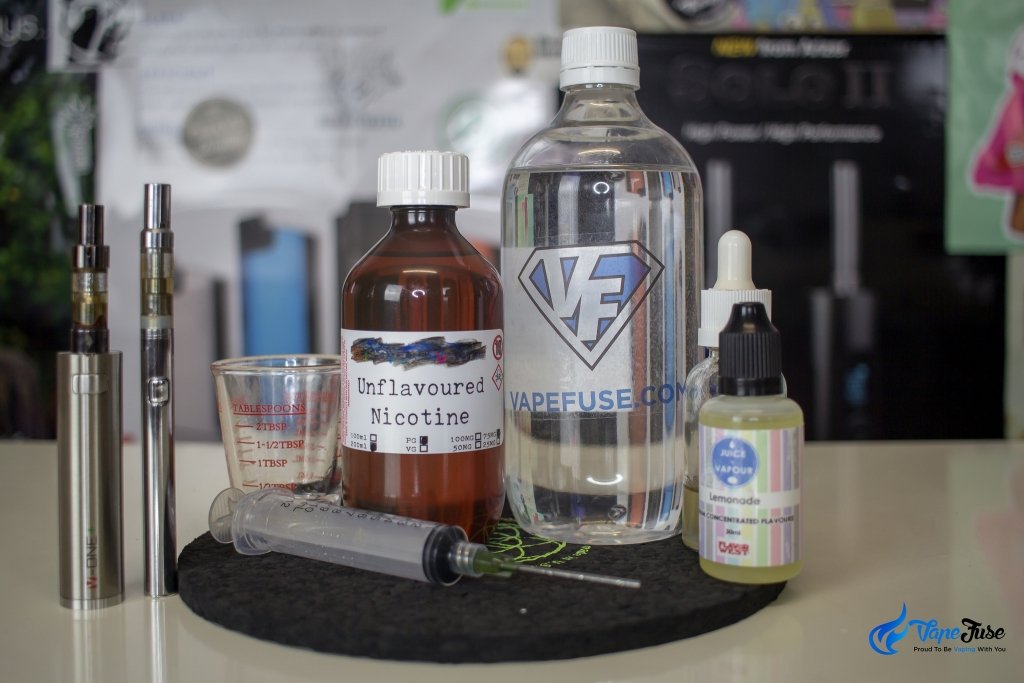
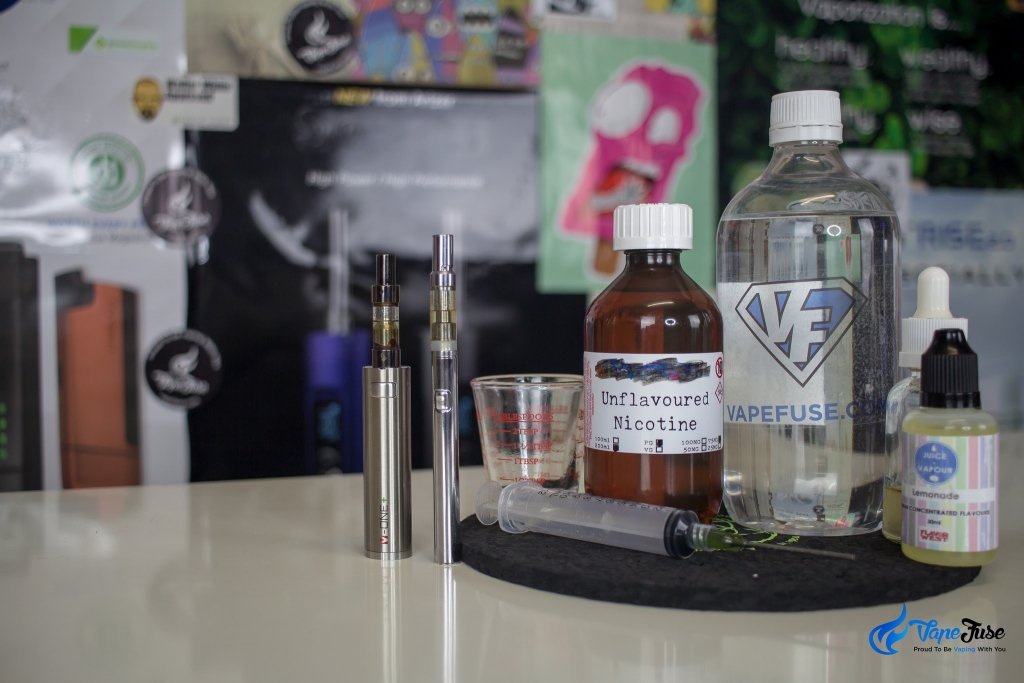
Most commercial e-Liquids are manufactured using a base mixture of propylene glycol and vegetable glycerin (or PG/VG). When purchasing from an online distributor you often are given the option to choose your PG/VG ratio.
50/50 is definitely the most common, but it can differ depending on vaping preferences. Rule of thumb is that PG carries that flavor better, whereas VG will be crucial in generating larger clouds of vapor.
There’s no rule as to how much PG/VG you can work with, but generally, it will form about 85% of your final product with the remaining percentage consisting of the flavor additive and liquid nicotine.
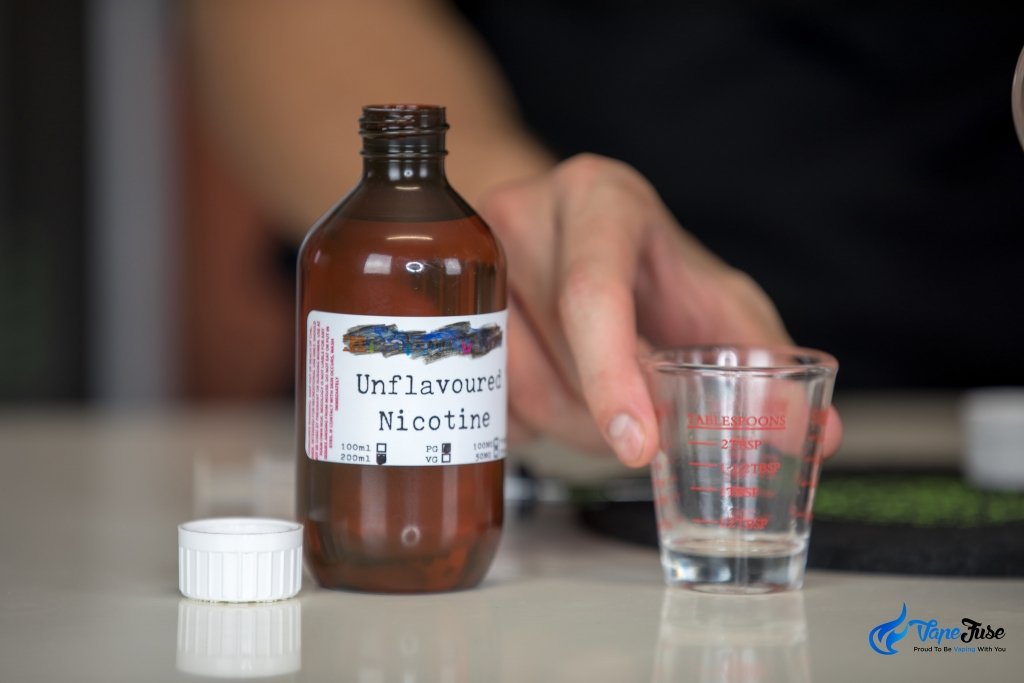
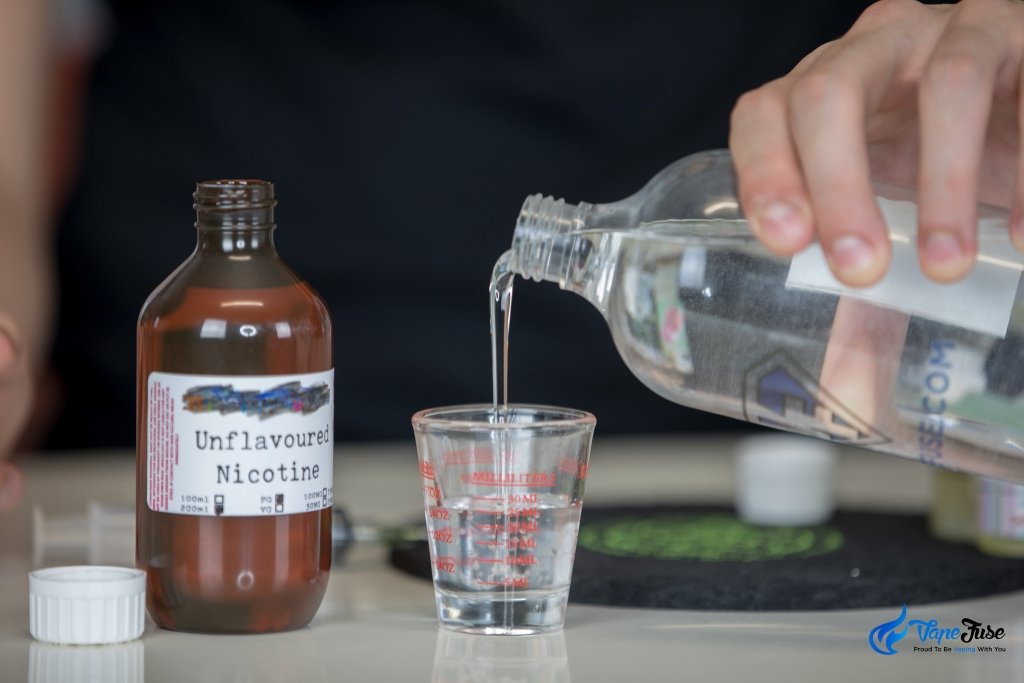
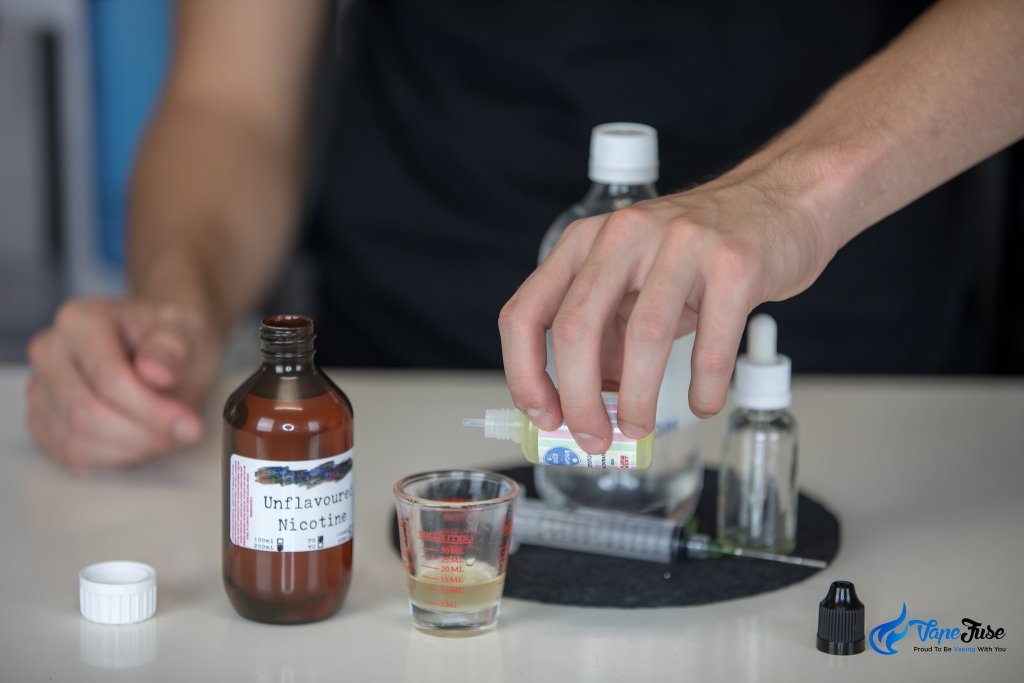
A good starting measure is 10ml, this whole process is made far easier with the use of a measuring cup. The whole process is a lot of trial and error to perfect your mix, so start slow and easy.
Step 2: Choosing Your Ratio
This is the tricky part. Nicotine itself is extremely dangerous to consume, so great care must be taken to ensure no damage is caused to your body.
Nicotine calculators like the one shown below are all over the web and are extremely useful in making your e-Liquid the correct strength.
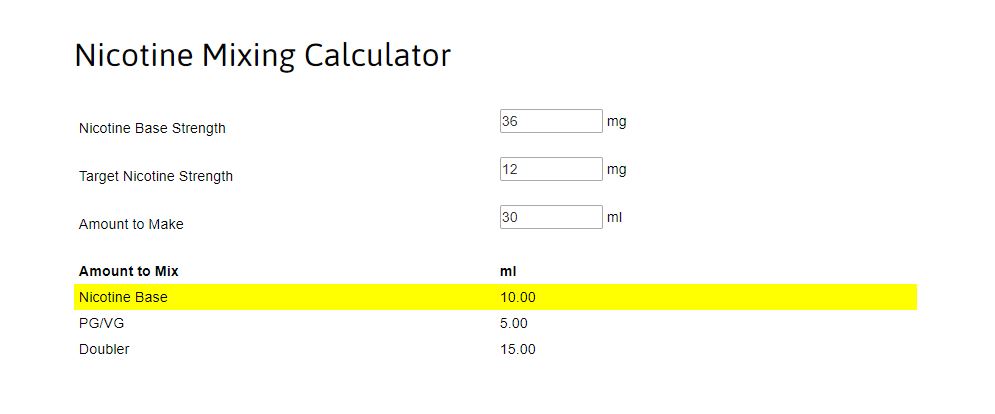
A good starting dose is 6mg of nicotine which is about as much as a light cigarette. If this dosage is too weak, recalculate and find a dose that is more suitable for you.
This process is simplified via the use of a micropipette or a syringe for measuring, which can also be used for stirring your blend.

Step 3: Adding Flavor
At this stage, your blend is basically ready to go. However, it’s going to taste shocking without any added flavor concentrate. These are available in every flavor you can think of and make your e-Liquid far more enjoyable.
A rule of thumb is to add 10% of the amount of PG/VG you added and work up from there. You can continue adding drops into your storage bottle and mixing it with your eye-dropper until it’s reached your desired flavor.
There’s been a lot of advancement in this scene recently, with some manufacturers even developing flavor concentrates to match the terpene profiles of cannabis plants.
Whether you’re looking to vape some grapes, a glass of fresh lemonade or a whiskey cola, there’s a concentrated flavor additive to suit your style. You can even mix flavors together to develop your own concoction!
Step 4: Vaping
Once you’ve safely calculated the percentages in your blend, you’ll need a vessel with which to enjoy your e-Liquid. At VapeFuse we stock a number of products that are suitable for consuming e-Liquids.
The CloudV Slim pictured above on the right is a dedicated liquid vape, and the hybrid Haze V2 and X Max V2 Pro come equipped with liquid chambers to consume your mix.
Similarly, devices like the Cloud Vape Pen and the X Max V-One Plus (above left) feature what’s called a 510 thread battery. These batteries are compatible with most e-Cigarette liquid tanks as well as the included concentrate atomizer.

Whether you’re looking to quit smoking entirely, or simply looking for a healthier way to get your nicotine fix, vaping is the new method you’ve got to try out!
With cigarette and commercial e-Liquid prices constantly rising, there’s never been a better time to make the switch and make your own DIY e-Liquid!


2 thoughts on “Mixing Nicotine-Rich eJuice: How to do it Safely”
Great job!
one of the best blog ever. Bookmarked for future read .